***
title: Website Chat Integration
description: >-
Embed Gail chat on your website to provide instant AI-powered customer support
through web chat
----------------
# Website Chat Integration
Gail can be embedded directly on your website as a chat interface, providing instant AI-powered support to your visitors. This guide walks you through the complete setup process, from creating your Gail to embedding the chat widget on your site.
## Overview
Website chat integration allows you to:
* Provide 24/7 instant support to website visitors
* Answer common questions automatically
* Qualify leads and schedule appointments
* Transfer to human agents when needed
* Maintain consistent brand experience
Web chat integration uses the same Gail configuration as your voice agents, ensuring consistent responses across all channels.
## Prerequisites: Create Your Gail First
Before you can embed chat on your website, you need to create and configure a Gail (AI agent). If you haven't already created a Gail, follow these steps:
### Step 1: Navigate to Gails
1. Log in to your Gail portal
2. Click **Gails** in the left-hand navigation menu
3. Click **Create New Gail** (or **Create Agent**)
### Step 2: Choose Your Setup Method
You have two options:
**Option A: Start with a Template**
Select a pre-built template that matches your use case:
| Template | Best For |
| ------------------- | ---------------------------------------- |
| Customer Support | Handling inquiries and troubleshooting |
| Appointment Booking | Scheduling and managing appointments |
| Sales Qualification | Lead qualification and follow-up |
| General Reception | Answering questions and routing requests |
**Option B: Build from Scratch**
Create a custom Gail tailored to your specific needs.
### Step 3: Configure Your Gail
Complete the basic configuration:
#### Name Your Gail
Choose a name that reflects its purpose (e.g., "Website Support Agent" or "Sales Assistant").
#### Write the Greeting Message
This is the first message visitors will see when they open the chat.
**Example greetings:**
```
Hi! I'm here to help answer your questions. What can I assist you with today?
```
```
Welcome to Acme Corp! I'm your virtual assistant. How can I help you?
```
```
Hello! I can help you with product information, scheduling, or answering questions. What brings you here today?
```
Keep greetings brief and welcoming. Let visitors know immediately what your Gail can help with.
#### Add Knowledge
Upload documents, web pages, and structured data to help your Gail answer questions accurately:
1. Navigate to the **Knowledge** section
2. Upload relevant documents (PDFs, Word docs, text files)
3. Add URLs to crawl web pages
4. Input structured data like FAQs or product information
See [Knowledge Base](/platform/knowledge/overview) for detailed instructions.
#### Configure Voice Settings (Optional)
If your Gail will also handle voice calls, configure voice settings through the dashboard. For web chat only, you can skip this step.
### Step 4: Test Your Gail
Before deploying to your website:
1. Use the test interface in the dashboard
2. Try asking various questions your customers might ask
3. Review responses for accuracy
4. Iterate on knowledge and configuration as needed
Once your Gail is configured and tested, you're ready to embed it on your website!
## Accessing Your Integration Code
Now that your Gail is ready, follow these steps to get the code needed to embed it on your website:
### Step 1: Navigate to Gails
1. Log in to the portal
2. Click on the **Gails** tab in the left-hand sidebar
3. This will display your list of active assistants
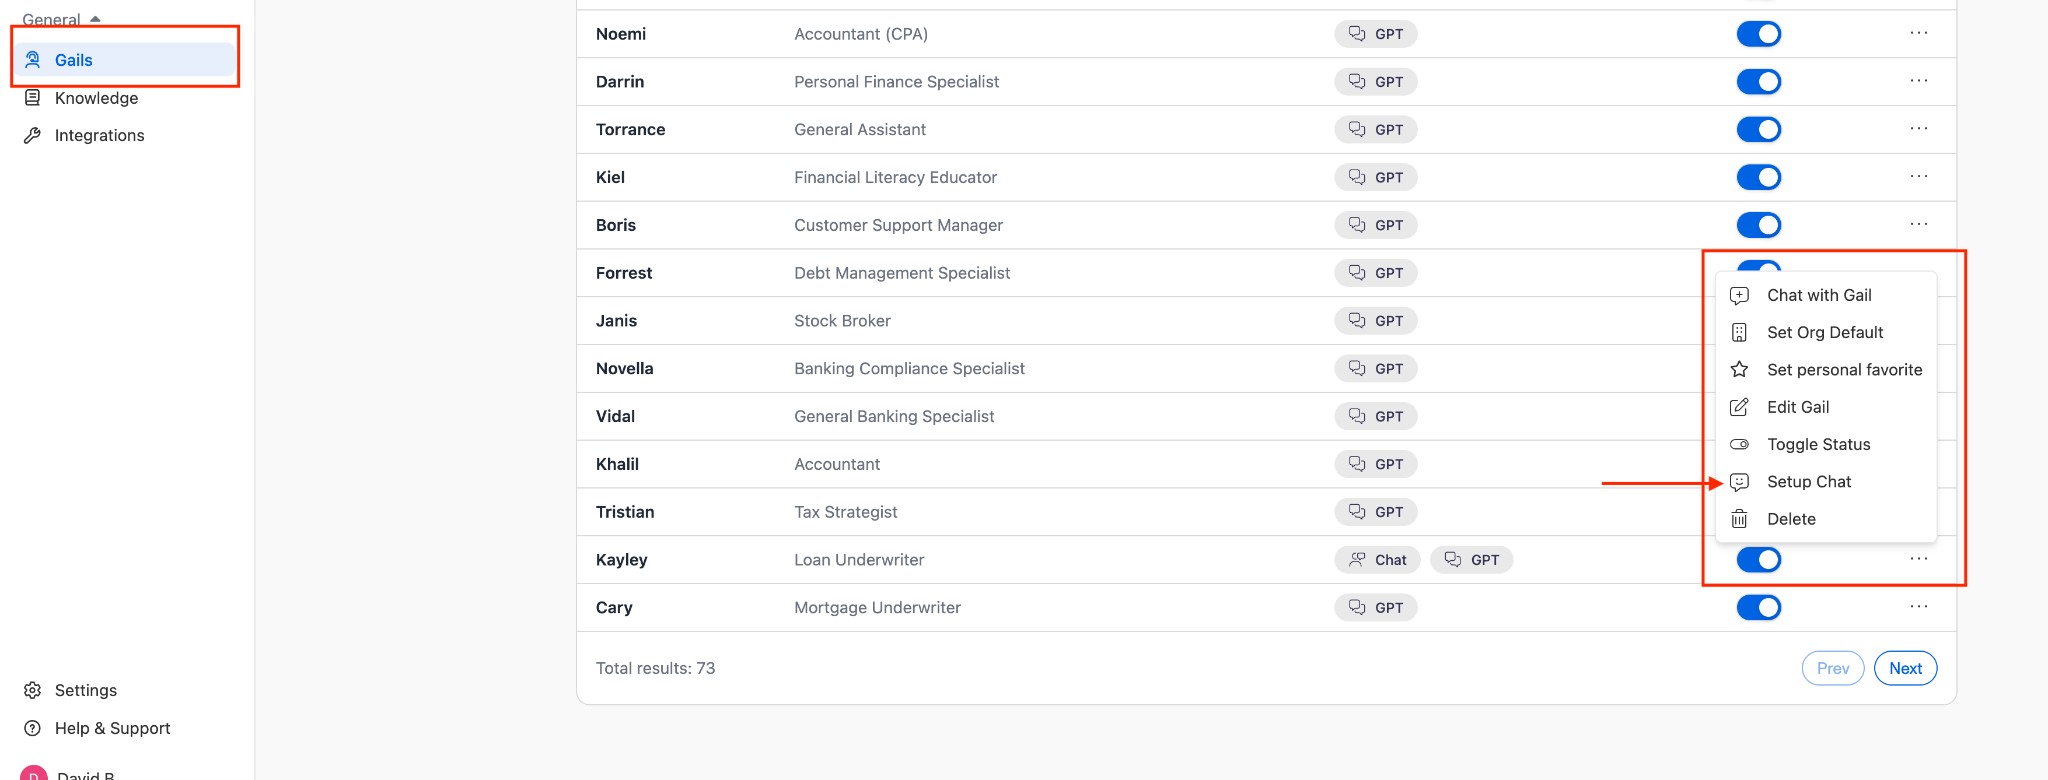
### Step 2: Select Your Assistant
1. Locate the specific Gail you want to integrate into your website
2. Click the **three dots (...)** on the far right of that assistant's row
3. A dropdown menu will appear
### Step 3: Open Integration Settings
From the dropdown menu, select **Setup Chat**.
### Step 4: Access Integration Code
A "Setup Chat Integration" window will appear with everything you need to deploy your Gail:
* **NPM Package**: Documentation for using the `@gail-ai/conversation-embed` package
* **Embeddable Frame**: Code to embed the full chat interface
* **Floating Widget**: Code for the corner chat bubble
* **IDs**: Your specific Organization ID and Assistant ID
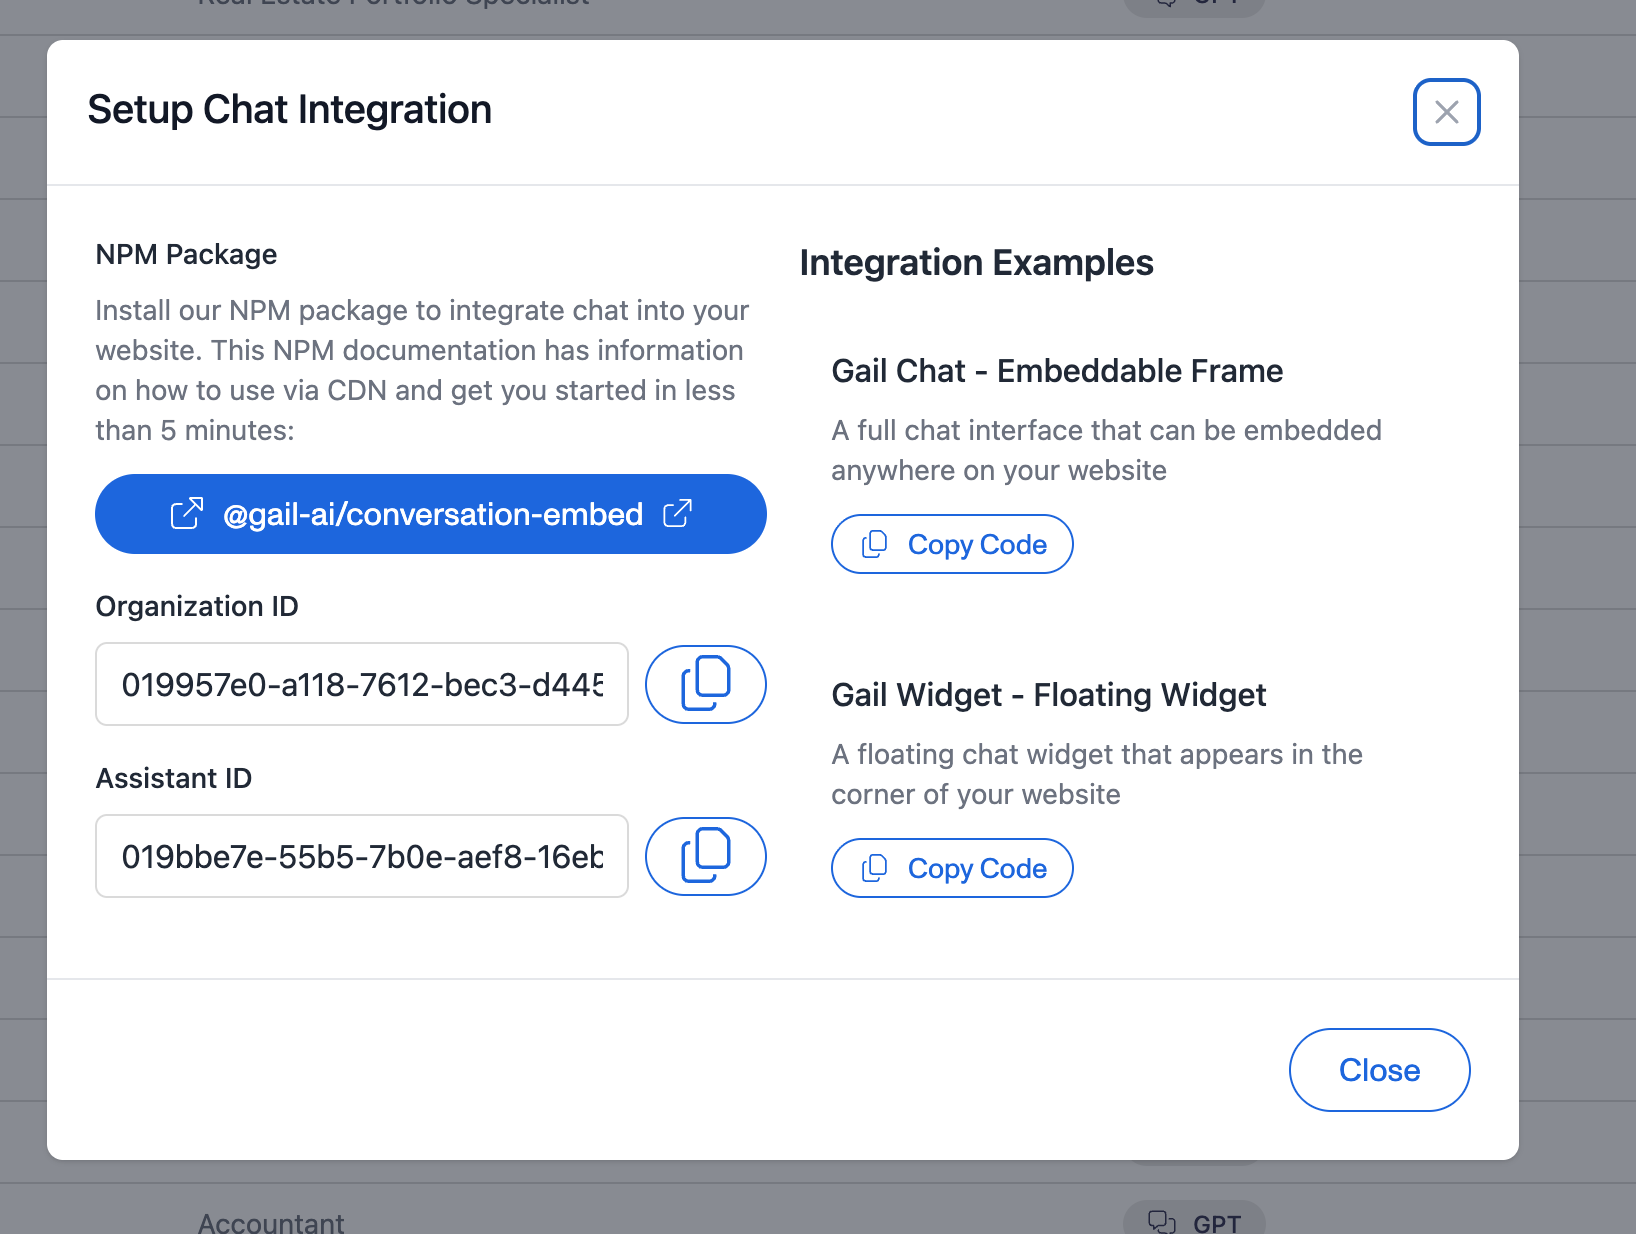
Keep this window open as you'll need to copy code from it in the next steps.
## Integration Methods
There are three ways to integrate Gail chat into your website. Choose the method that best fits your technical requirements and user experience goals.
### Method 1: Floating Widget (Recommended)
The floating widget appears as a chat bubble in the corner of your website. This is the most popular option as it's non-intrusive and familiar to users.
**Best for:**
* General website use
* Providing support without disrupting content
* Maintaining consistent access across all pages
#### Implementation Steps
1. In the "Setup Chat Integration" window, click the **Floating Widget** tab
2. Copy the provided code snippet
3. Paste the code into your website's HTML, just before the closing `` tag
**Example code structure:**
```html