Complete SMS Setup Guide
This comprehensive guide walks you through every step of setting up SMS capabilities with Gail, from initial approval to analyzing campaign performance. Follow this end-to-end process to launch your first successful SMS outreach campaign.
This guide combines multiple setup processes into one complete workflow. Each section links to detailed documentation if you need more information on specific topics.
Overview
Setting up SMS with Gail involves four main phases:
- Application - Get approved for SMS and configure your Gail
- Content & Audience - Create message templates and build contact lists
- Launch - Run your SMS campaign
- Review - Analyze performance and optimize
Let’s walk through each phase step by step.
Part 1: SMS Qualification & Initial Gail Setup
Before you can send any SMS messages, you need to complete two critical prerequisites: SMS approval and Gail configuration.
Step 1: Apply for SMS Approval
This is the most crucial first step! You must be approved for SMS within the Gail platform to send text messages.
Navigate to Settings
- From the left-hand menu, click Settings
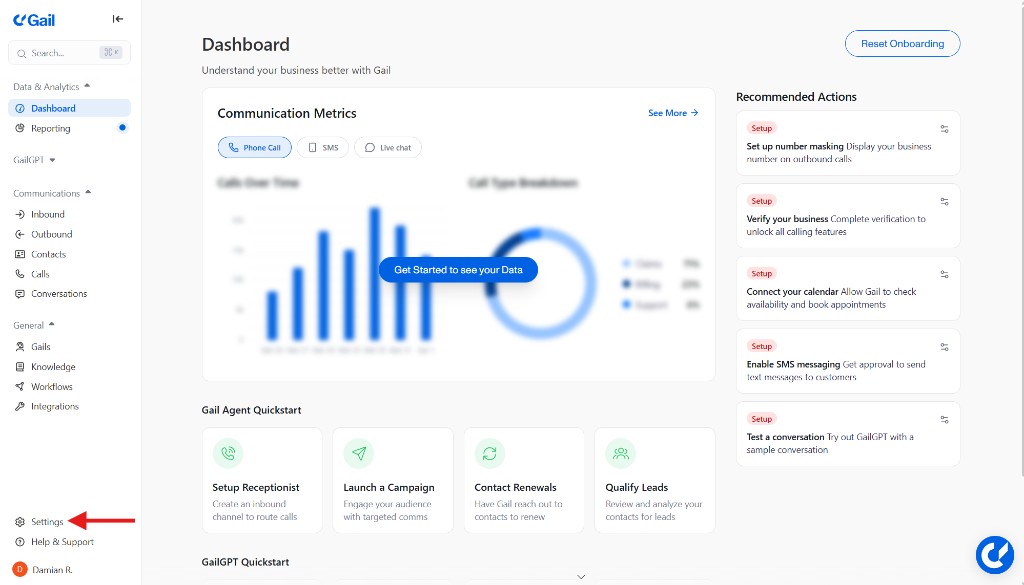
- Scroll down to the Verify Messaging section
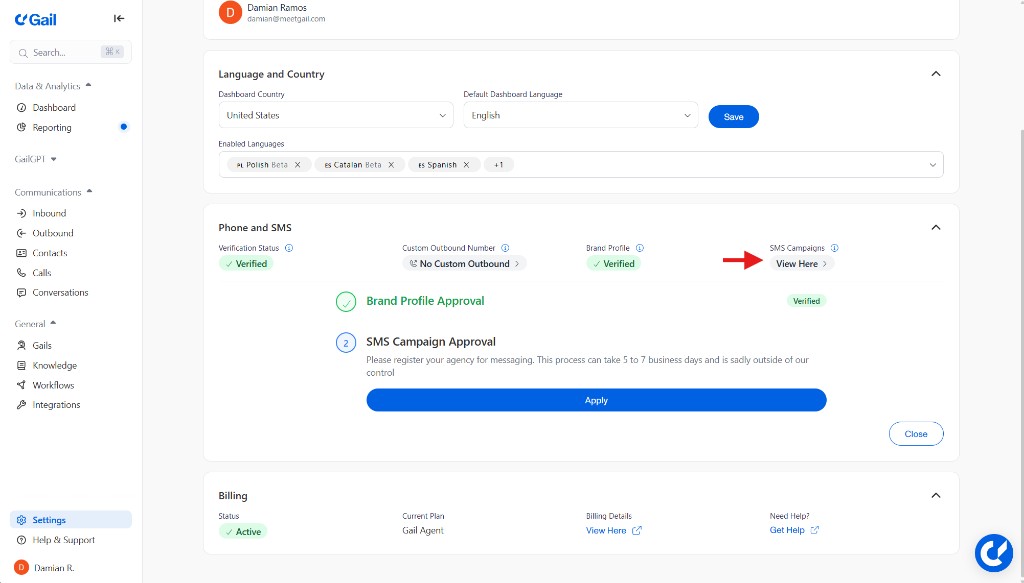
Verify Your Business
Before applying for SMS:
- Ensure your agency is verified as a business in Gail
- Complete the Verify Phone process if not already done
- Confirm the verification section displays VERIFIED
You must complete business verification before you can apply for SMS approval.
Start the Application
- In the SMS Campaigns section, click Apply

- Review the TCPA disclaimer that appears
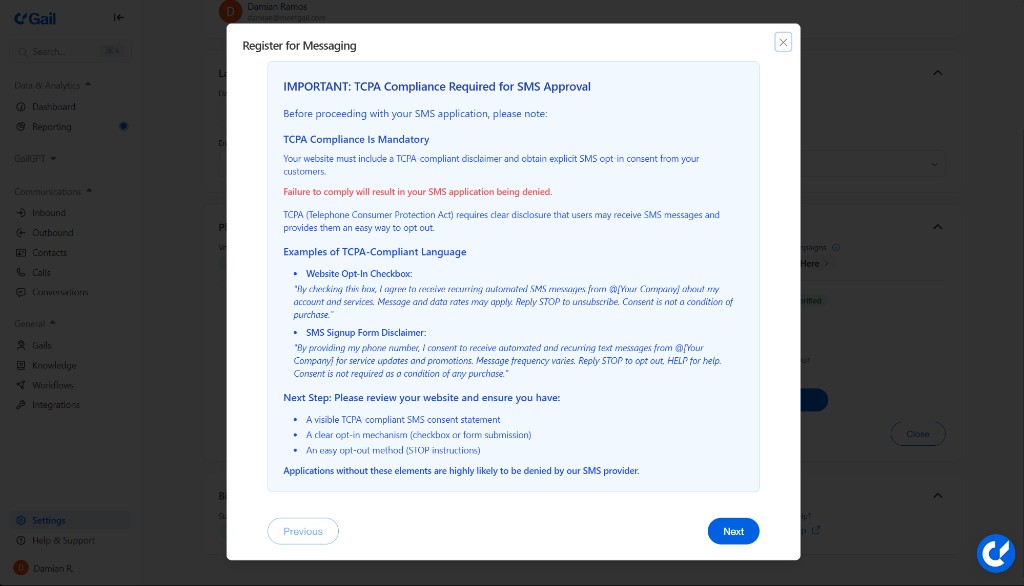
- Click Next to continue
Provide Your Use Case
Select the messaging category that best fits your business:
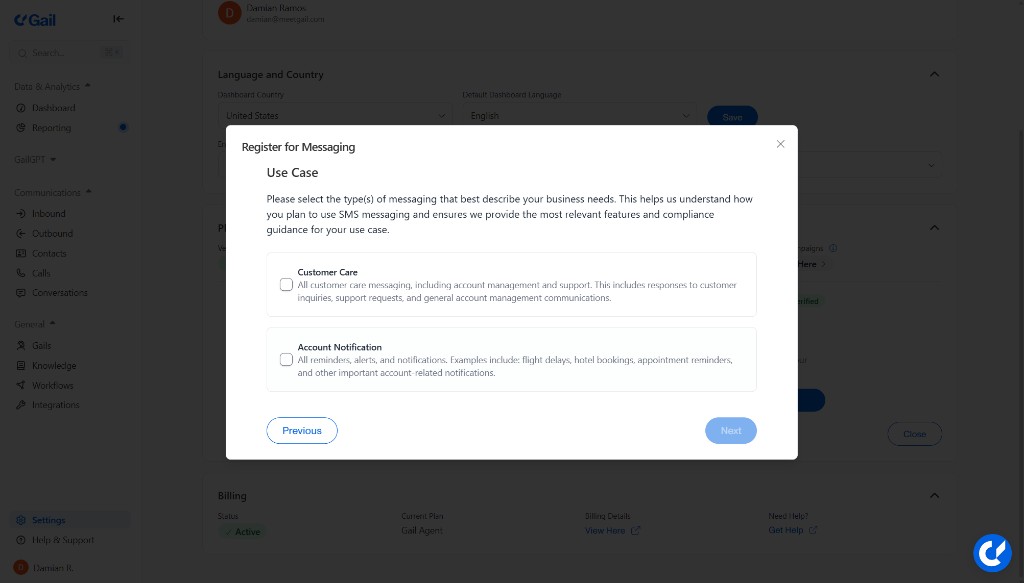
Choose your category and click Next.
Describe How You’ll Use SMS
Provide a detailed description of your SMS use case. You can use a provided template or write your own.
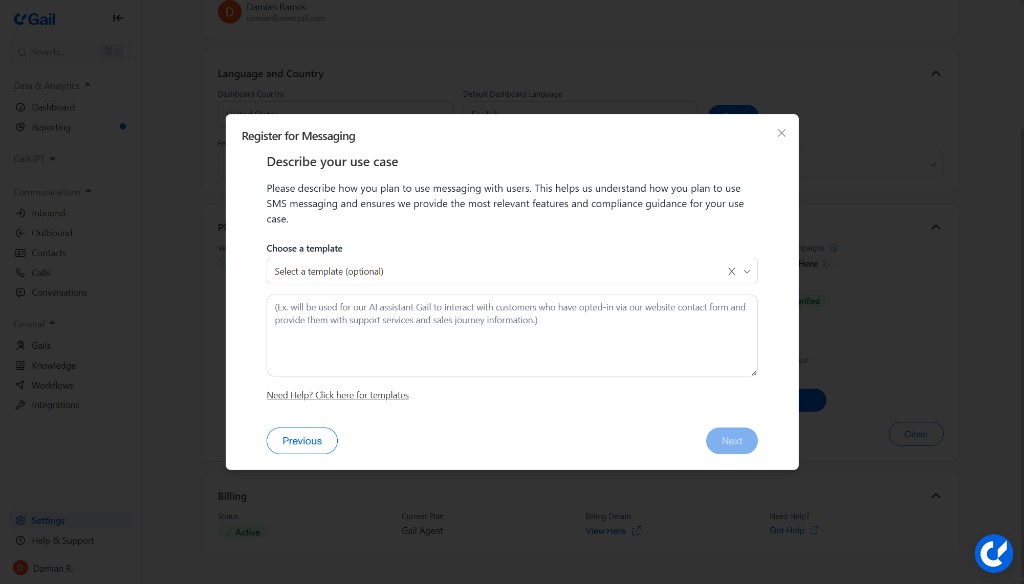
Example:
Click Next when complete.
Define Your Opt-In Process
This is critical for TCPA compliance. Thoroughly describe:
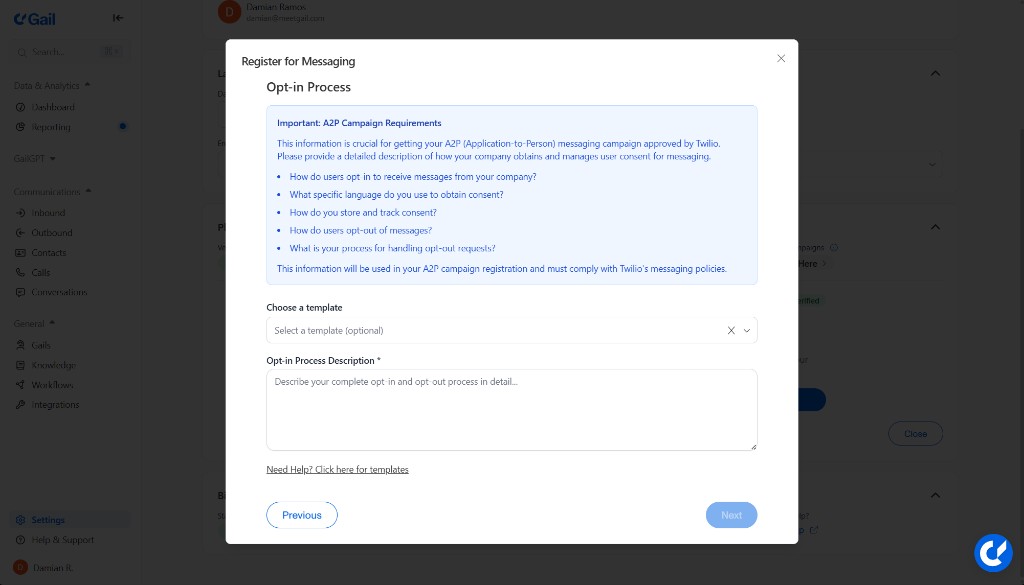
- How users opt in - Describe the specific method (web form, checkbox, etc.)
- Consent language used - Provide exact wording customers see
- How consent is stored - Explain your record-keeping process
- How users opt out - Describe the opt-out mechanism (STOP keyword, etc.)
- How opt-outs are handled - Explain how you honor opt-out requests
Example:
Click Next after completing this section.
Add Sample Message Templates
Provide at least two example SMS messages you plan to send.
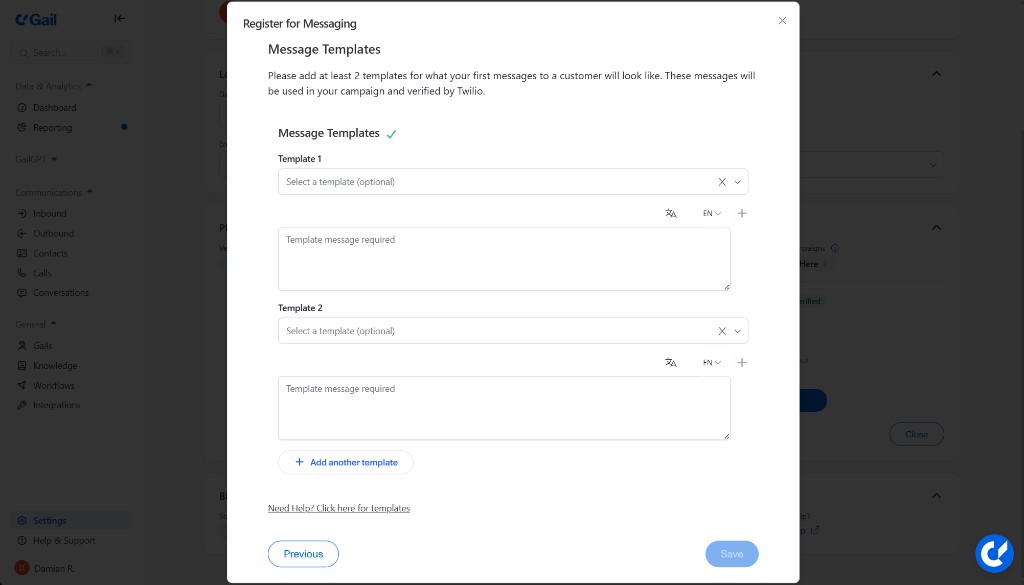
Example 1 - Appointment Reminder:
Example 2 - Policy Renewal:
Include realistic examples that represent the types of messages you’ll actually send. This helps ensure faster approval.
Submit and Wait for Approval
- Review all information for accuracy
- Click Save to submit your application
- Wait for approval (typically 5-7 business days)
- You’ll receive a notification once the review is complete
Check your approval status at Settings → SMS Campaigns.
While waiting for SMS approval, you can proceed with Step 2 to prepare your Gail configuration and campaign content.
Step 2: Create or Configure Your Gail for SMS
Once approved (or while waiting), configure your Gail agent for SMS capabilities.
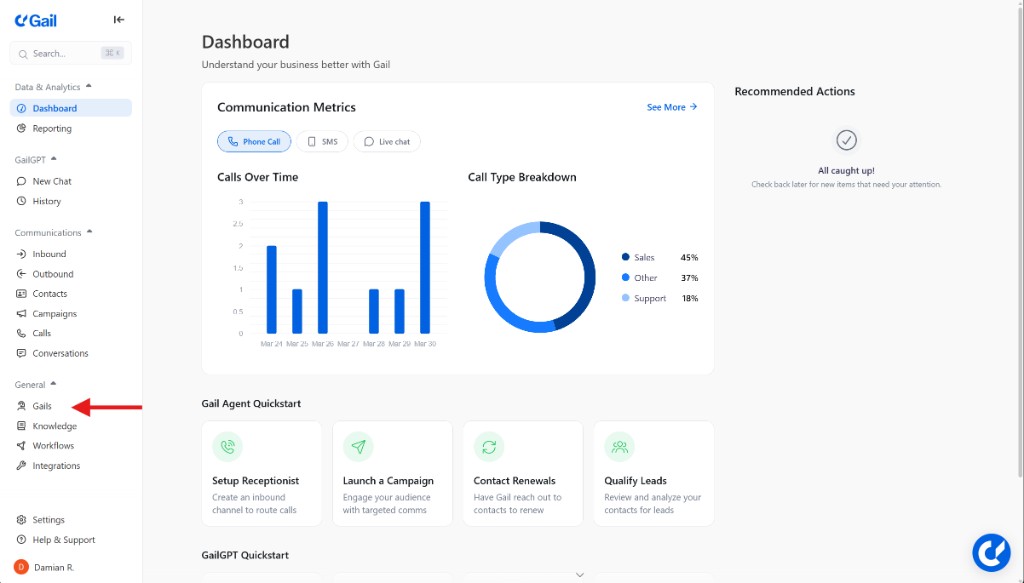
Navigate to Gails
- In the left-hand menu, click General
- Select Gails from the dropdown
Create or Edit Your Gail
Choose one of these options:
- Click Create a Gail to build a new agent for SMS

- Select an existing Gail you want to enable for SMS
Configure Gail Settings
You can use Basic Mode or Advanced Mode:
Basic Mode:
- Gail name (e.g., “SMS Assistant”)
- Specialty (e.g., “Customer Communication”)
- One-sentence description
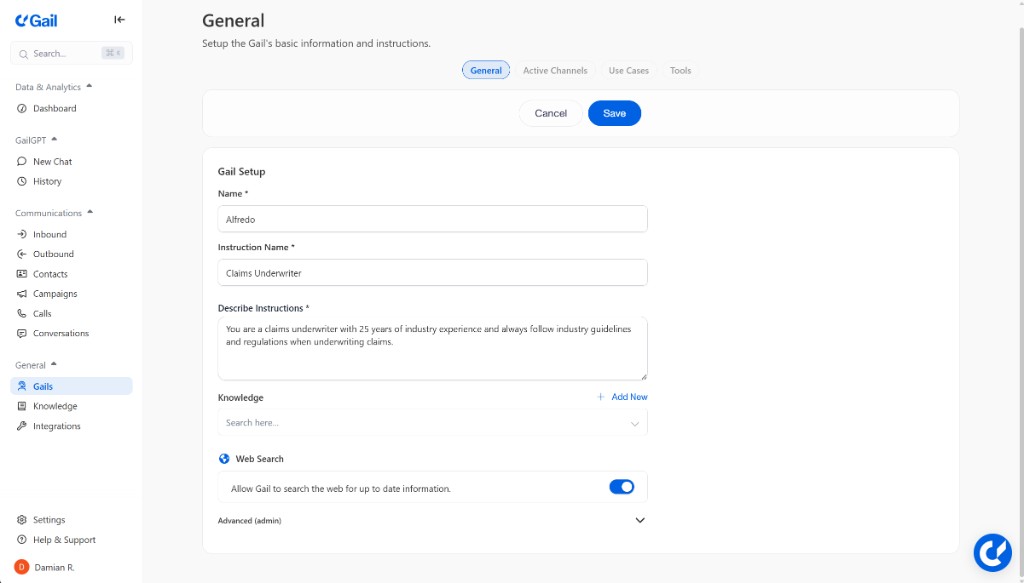
Advanced Mode:
- More control over persona and tone
- Custom abilities and behaviors
Add Knowledge (Optional but Recommended)
To help Gail answer inbound SMS questions when clients reply:
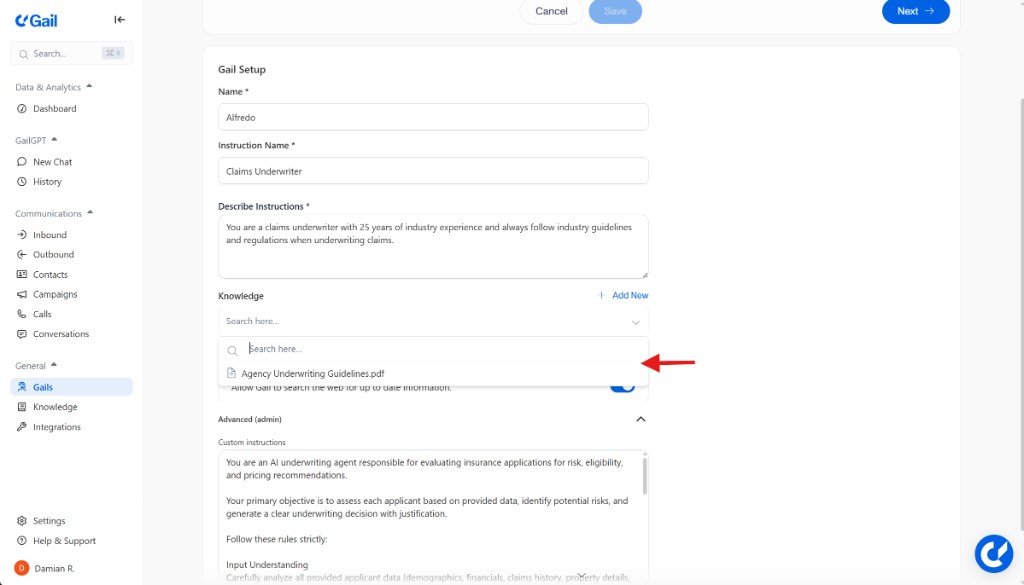
- Go to the Knowledge Base section
- Upload relevant documents (FAQs, product info, policies)
- Add structured data if needed
See Knowledge Base for details.
Enable SMS Channel (once approved for SMS)
This is the critical step for SMS functionality:
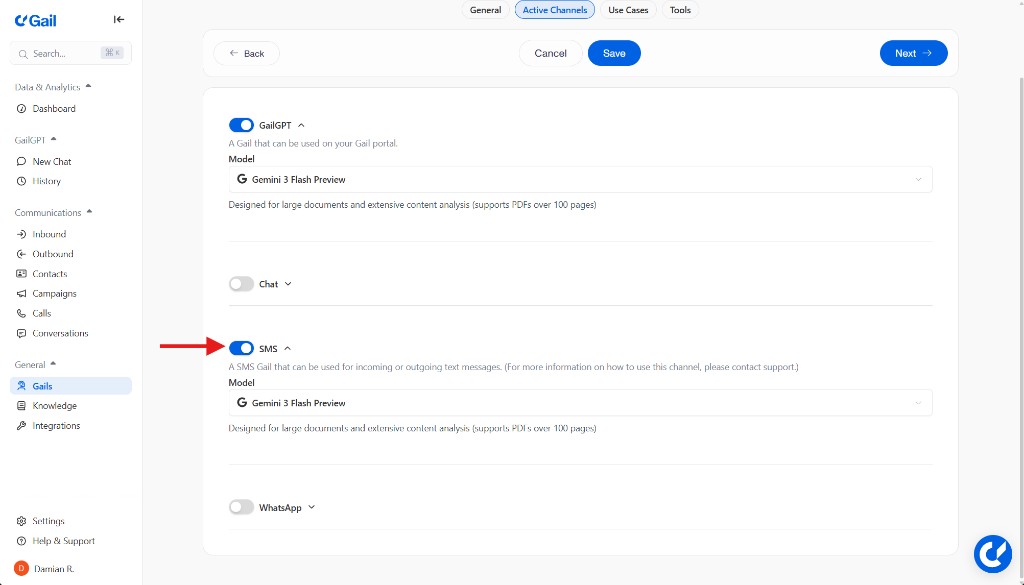
- Scroll to the Channels section
- Ensure SMS is toggled ON
- Select the Model you would like your agent to use for SMS
Your dedicated SMS number is the Gail line shown in the “Calls” tab of your portal. This is the number clients will text or receive messages from.
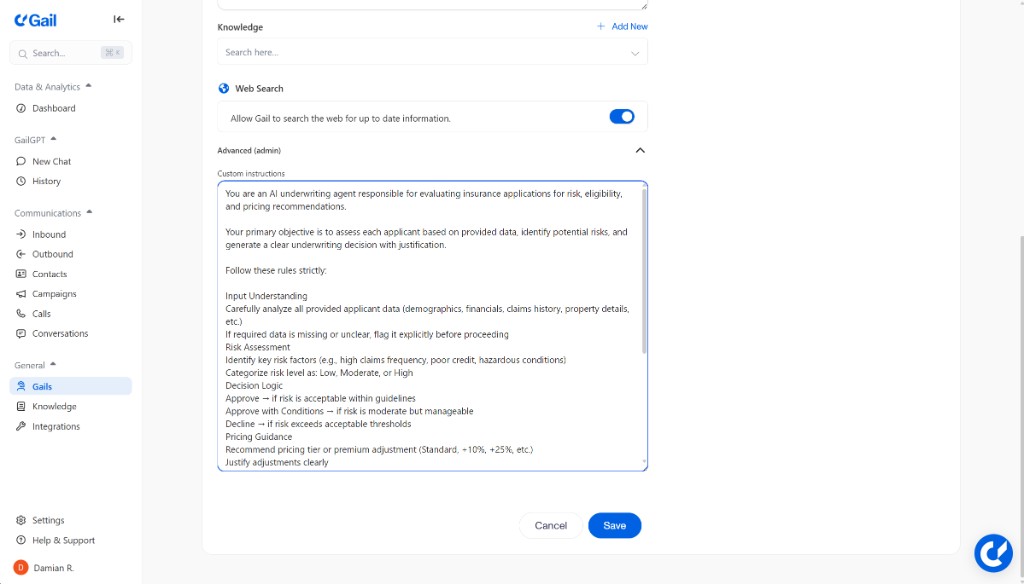
Set Rules and Constraints (Optional)
Define specific rules Gail must follow during SMS conversations:
- Compliance requirements
- Brand voice guidelines
- Information Gail should never share
- Escalation triggers
Save Your Gail
Click Save to activate your SMS-enabled Gail.
Your Gail is now configured for SMS! Next, we’ll create the content for your campaign.
Part 2: Building Your SMS Campaign
Now that your Gail is ready for SMS, create your campaign content and prepare your audience.
Step 3: Create Your SMS Text Template
Templates are the actual message content Gail will send.
Navigate to Text Templates
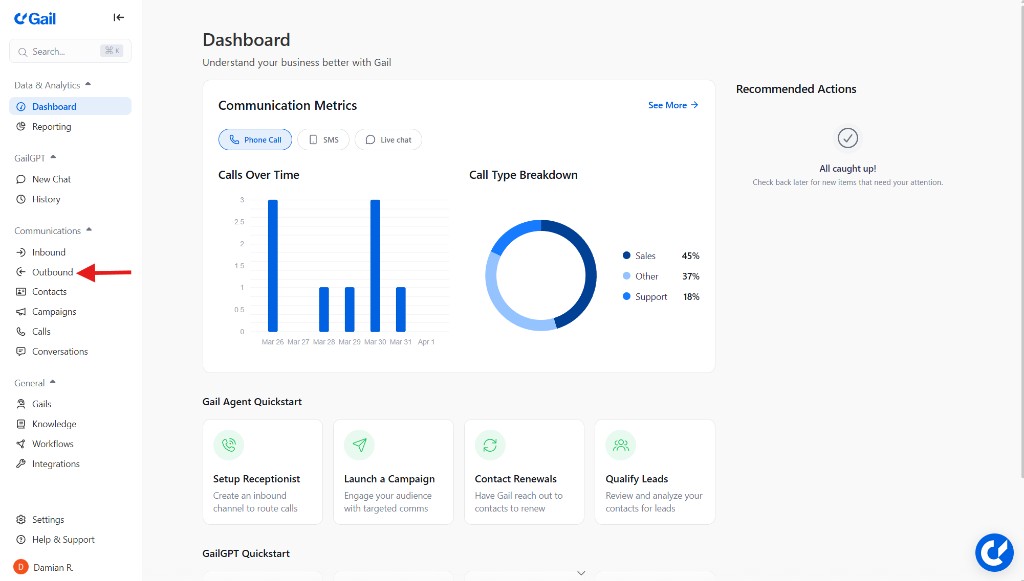
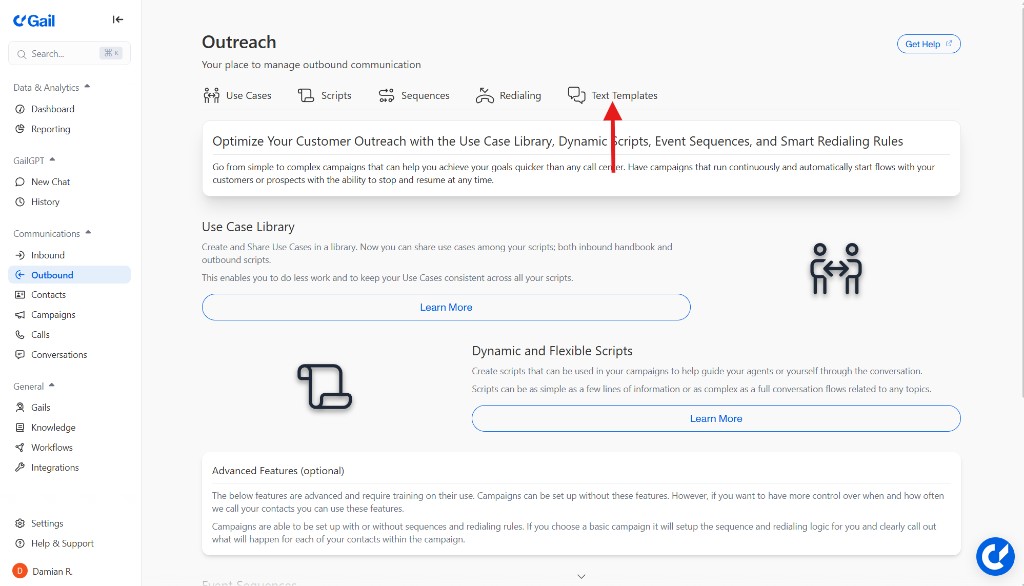
- In the left-hand menu, click Outbound
- Click Text Templates at the top right
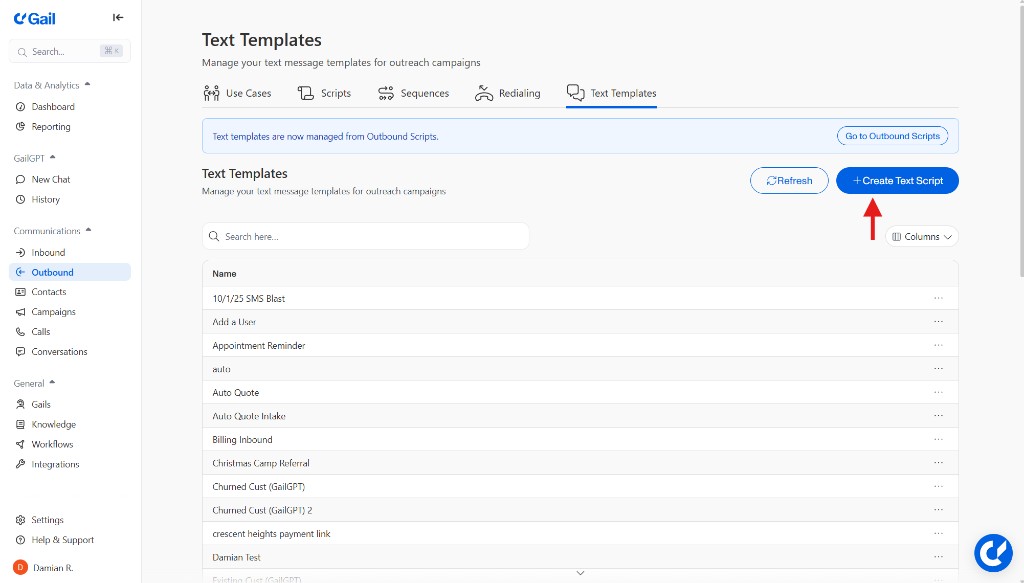
Create a New Template
Click Create Text Script.
Configure Template Settings
Fill out the template details:
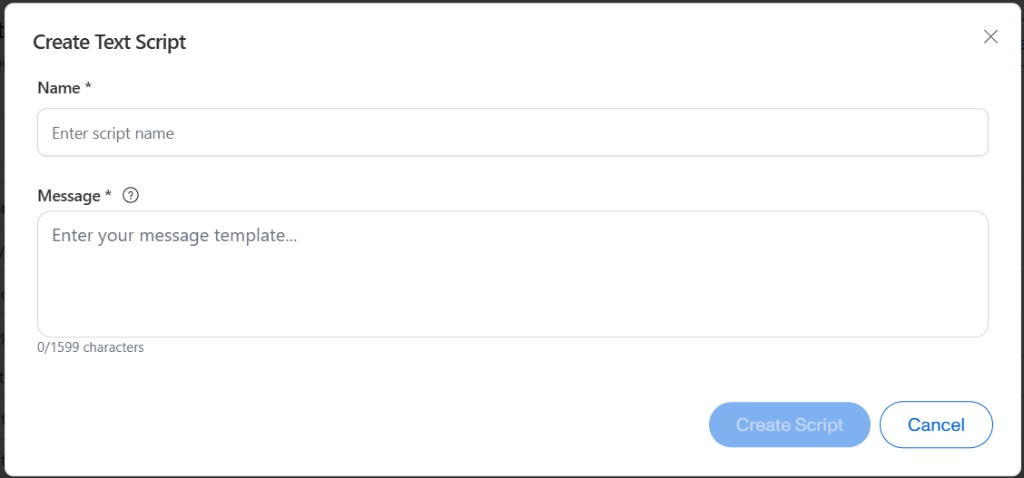
Name the Script: Give it a clear, descriptive name for your internal use.
Examples:
- “Monthly Newsletter SMS”
- “Policy Reminder Text”
- “Appointment Confirmation Message”
Type Your Message:
- Character Limit: Maximum of 1,599 characters
- Include Links: Embed URLs to quote forms, appointment scheduling, or resources
- Personalization: Use dynamic fields to customize messages
Dynamic Fields Examples:
@FirstName- Contact’s first name@LastName- Contact’s last name@PolicyNumber- Policy number@CompanyName- Your agency name
Example Message:
Always include:
- Your business name
- Clear call-to-action
- Opt-out instructions (Reply STOP)
- Value for the recipient
Save the Template
Click Create Script to save your template.
Create Additional Templates (Optional)
Create multiple templates for different campaign purposes:
- Welcome messages
- Appointment reminders
- Payment notifications
- Renewal alerts
- Promotional offers
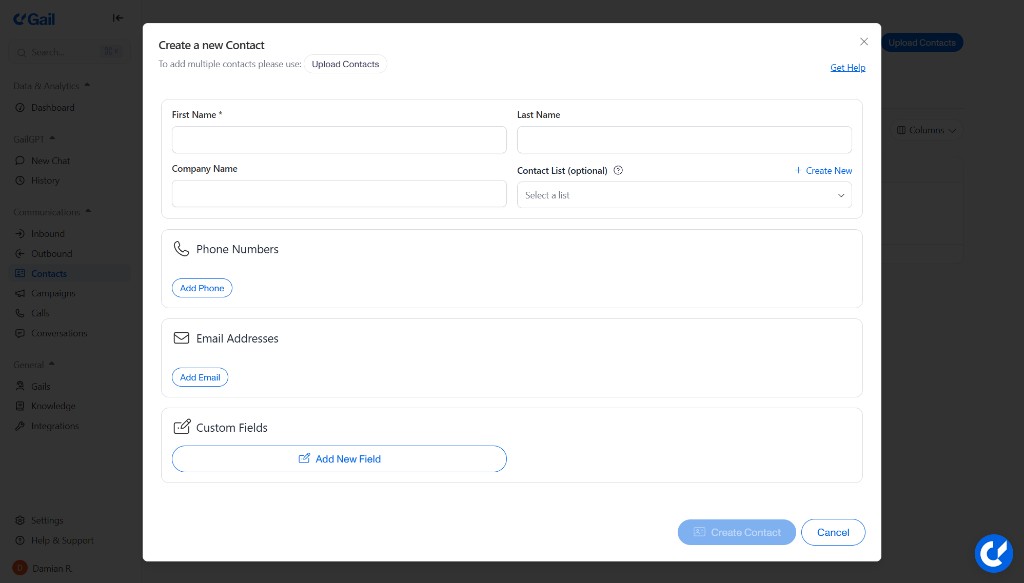
Step 4: Prepare Your Contact List
You need contacts to send messages to. Here’s how to organize them.
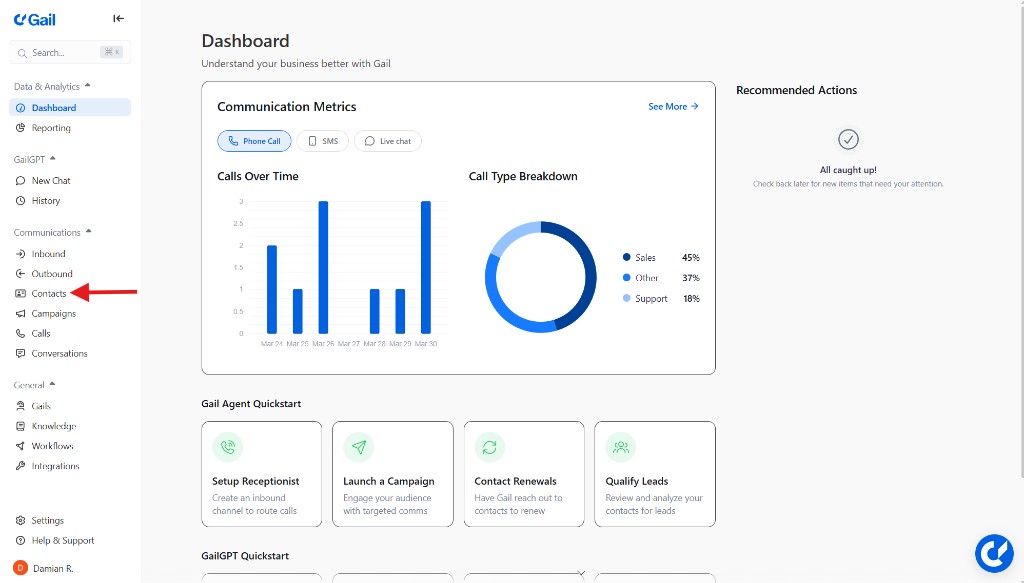
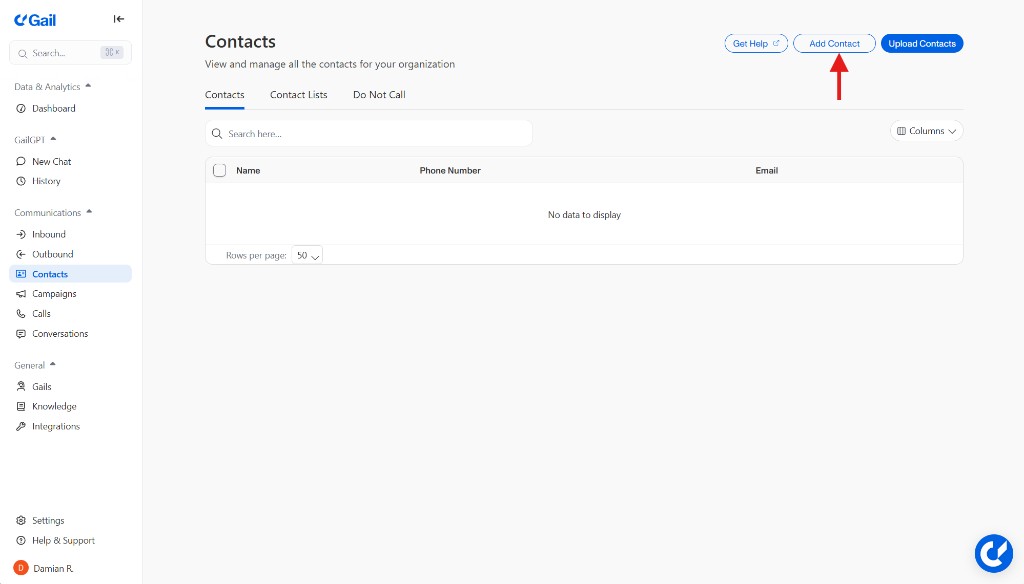
Navigate to Contacts
Select Contacts
Upload or Manage Contacts
You have several options:
Option 1: Upload New Contacts
- Click Upload Contacts

- Select a CSV file with your contact information
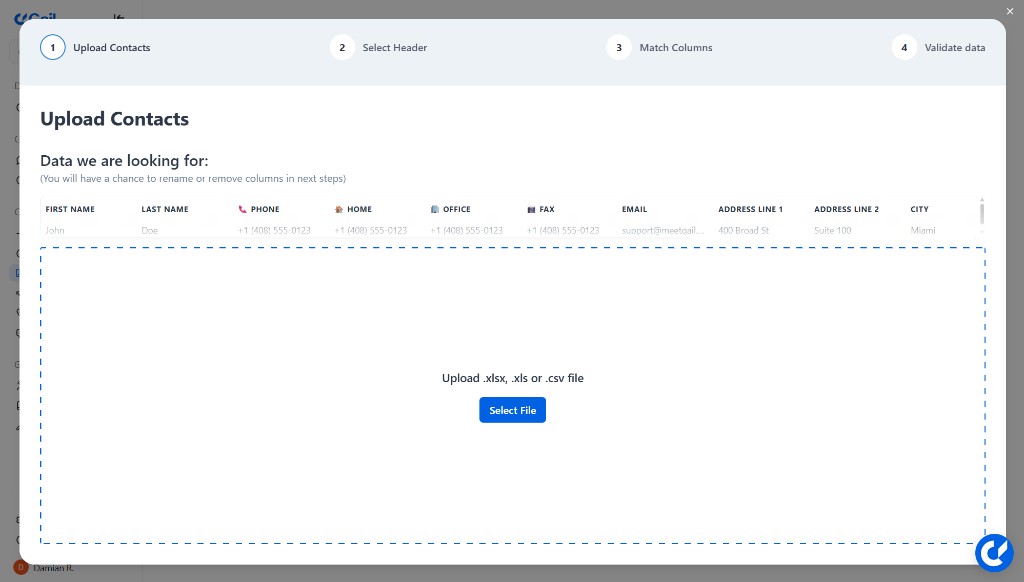
- Ensure phone numbers are correctly formatted (E.164 format recommended)
CSV Format Example:
Option 2: Use Existing Contacts
If you’ve already imported contacts, you can organize them into lists.
Option 3: Manual Entry
Add contacts individually through the interface.
Format Phone Numbers Correctly
Ensure phone numbers are properly formatted:
- Include country code (e.g., +1 for USA)
- No spaces or special characters (or use standard formatting)
- Example: +15551234567
Only include contacts who have explicitly opted in to receive SMS messages. Sending unsolicited texts may violate TCPA regulations and result in penalties.
Create a Contact List
Group contacts you want to reach with your SMS campaign:
- Click Create Contact List
- Give it a descriptive name (e.g., “January Marketing List,” “Policy Renewal - Q1”)
- Select the contacts to include
- Save the list
List Organization Tips:
- Segment by customer type
- Group by engagement level
- Organize by campaign purpose
- Tag by geographic location
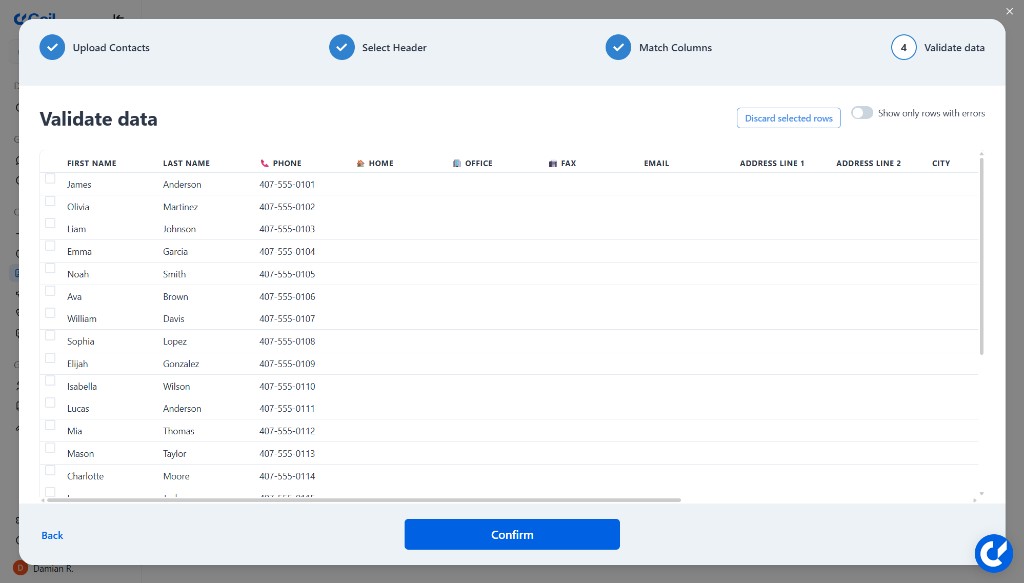
Verify Contact Data
Before launching a campaign, verify:
- ✅ All contacts have valid phone numbers
- ✅ All contacts have opted in to SMS
- ✅ Dynamic fields (like
@FirstName) have corresponding data - ✅ No duplicate contacts in the list
Part 3: Running Your SMS Campaign
With your Gail, template, and contacts ready, it’s time to launch your campaign.
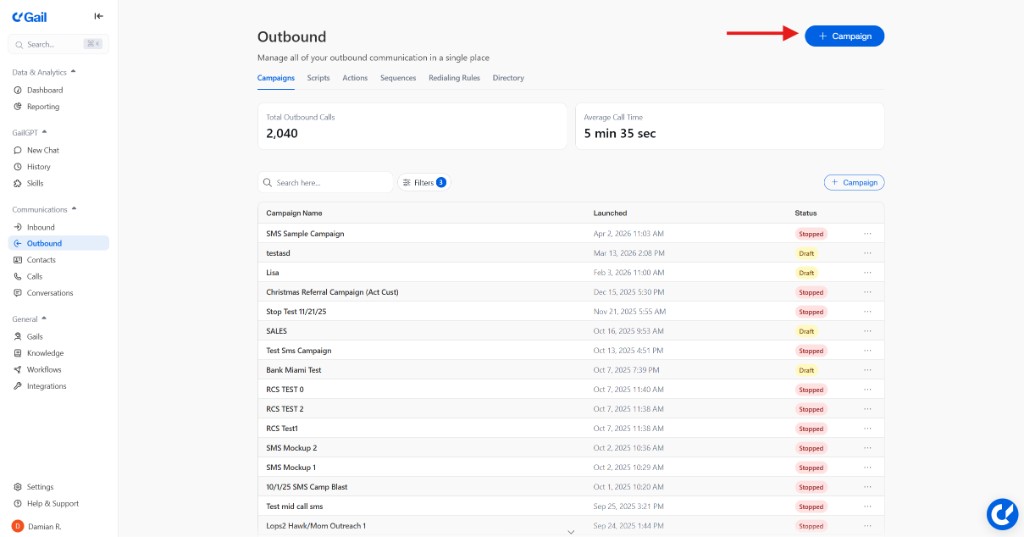
Step 5: Create Your SMS Campaign
Navigate to Campaigns
- In the left-hand menu, click Campaigns
- Click the New Campaign button
Enter Campaign Details
Campaign Name:
Give your campaign a descriptive title (minimum 5 characters).
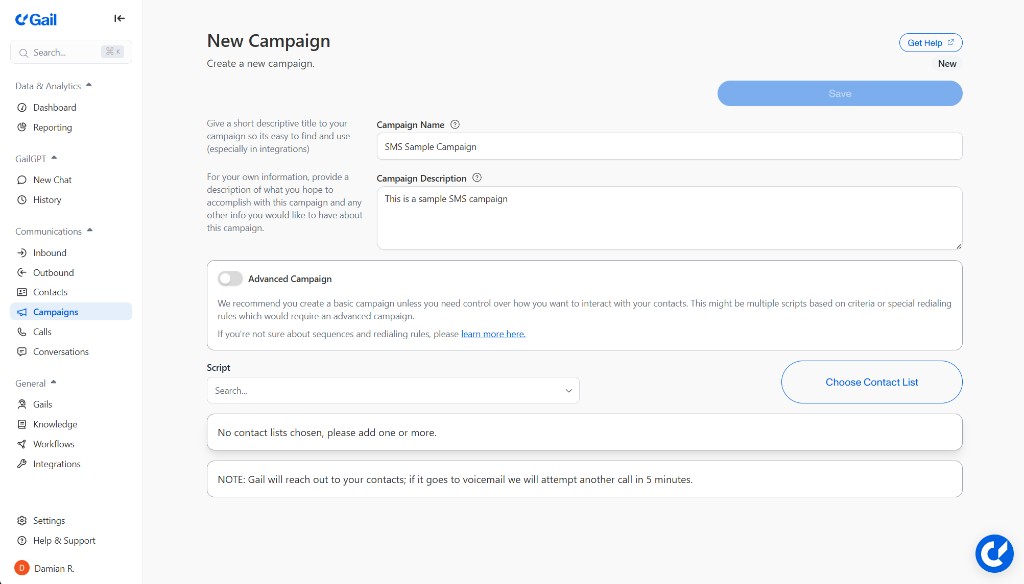
Best Practices:
- Be specific about purpose (e.g., “Q1 Payment Reminders”)
- Include date or period (e.g., “March Appointment Confirmations”)
- Use consistent naming conventions
- Avoid generic names like “SMS Campaign 1”
Examples:
- “Insurance Renewal Reminders - February 2026”
- “Appointment Confirmations - Week of Jan 27”
- “Policy Update Notifications - Winter Campaign”
Campaign Description:
Add a description explaining:
- Target audience
- Expected outcomes
- Campaign timing or context
- Any special notes
Example:
Select Your Script
- Click the Script dropdown menu
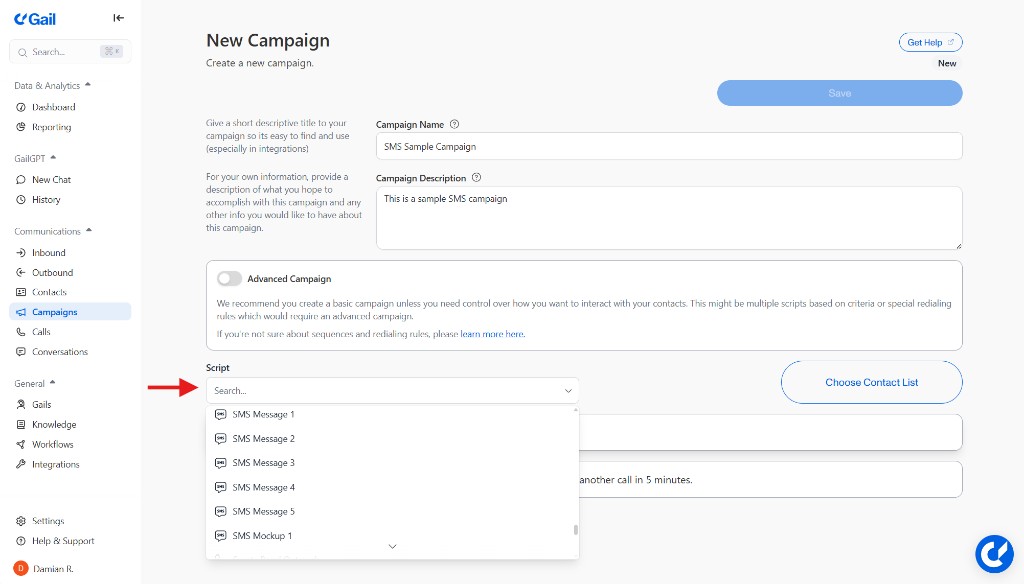
- Choose the text template you created in Step 3
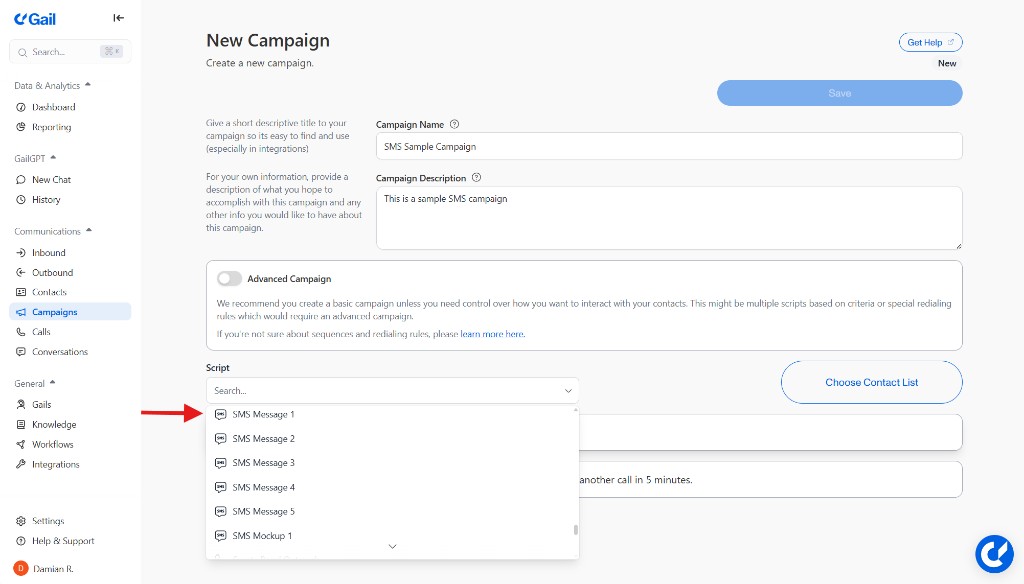
Templates are distinguished by icons:
- 📞 Call scripts have a telephone icon
- 💬 Text scripts have an SMS icon
Make sure to select a text script (💬) for your SMS campaign.
If you don’t see the template you need:
- Navigate to Outreach → Text Templates
- Create a new template
- Return to your campaign and select it
Choose a Contact List
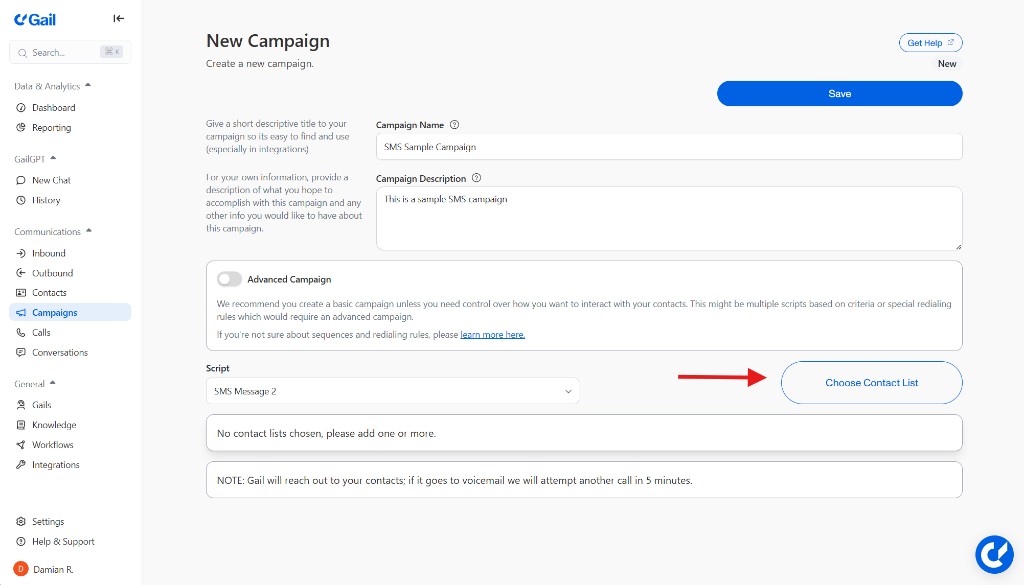
- Click Choose Contact List
- A modal will appear with your available lists
- Select the list containing contacts for this campaign
Before proceeding, verify:
- Contacts have opted in to receive SMS
- Phone numbers are properly formatted
- Variables used in your template have corresponding data in contact records
- List size is appropriate for your campaign goals
Review Campaign Settings
Before launching, double-check everything:
Step 6: Test Your Campaign (Highly Recommended!)
Never skip testing! Always test before sending to your full list.
Create a Test Contact List
- Navigate to Contacts
- Create a new contact with your own phone number
- Create a small test list with just yourself (and maybe a colleague)
Run a Test Campaign
- Create a new campaign (or duplicate your main campaign)
- Select your test contact list
- Launch the campaign
- Wait to receive the test message
Verify Everything
When you receive the test message, check:
- ✅ Message appears correctly formatted
- ✅ All links work and go to correct destinations
- ✅ Personalization fields populate accurately
- ✅ Opt-out instructions are clear
- ✅ Message tone and content are appropriate
- ✅ Character count is within limits (not broken across multiple texts)
Fix Any Issues
If you find problems:
- Edit your template
- Update your contact list data
- Modify campaign settings
- Run another test
Only proceed to full launch once your test is perfect!
Step 7: Launch the Campaign
Once testing is complete and you’re satisfied:
Save the Campaign
- Click the Save button

- Review all settings one final time
Start Sending
- Click the Start button to launch
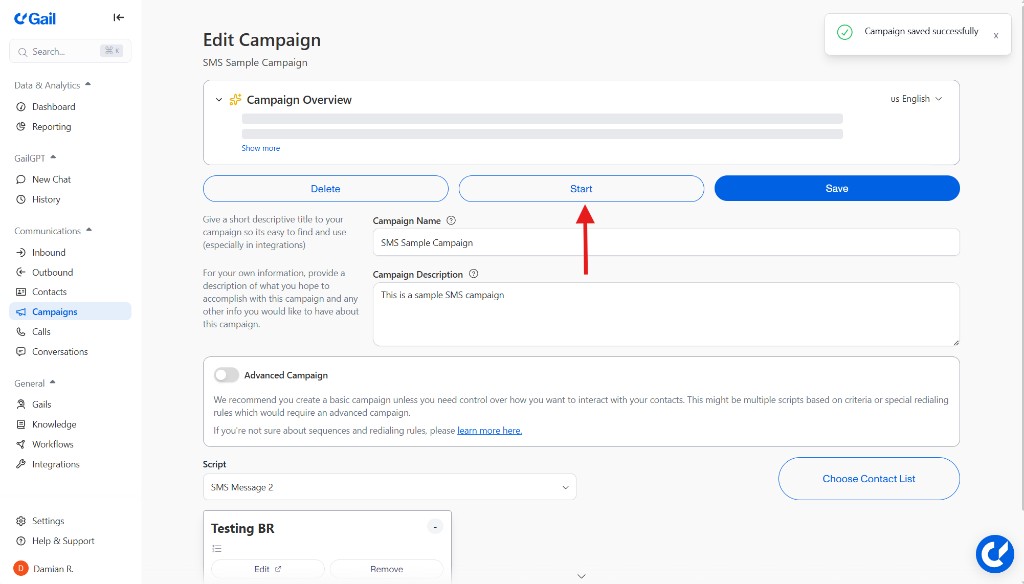
- Your campaign is now live!
Your SMS campaign is running! Gail will send text messages to your selected contacts according to your template.
Part 4: Reviewing Your SMS Campaign Performance
After launching, monitor and analyze your campaign to understand its effectiveness.
Step 8: Review SMS Conversations and Replies
Track how recipients are responding to your messages.
Navigate to Conversations
- In the left-hand menu, click Conversations
View Message History
Here you’ll see all inbound and outbound SMS messages:
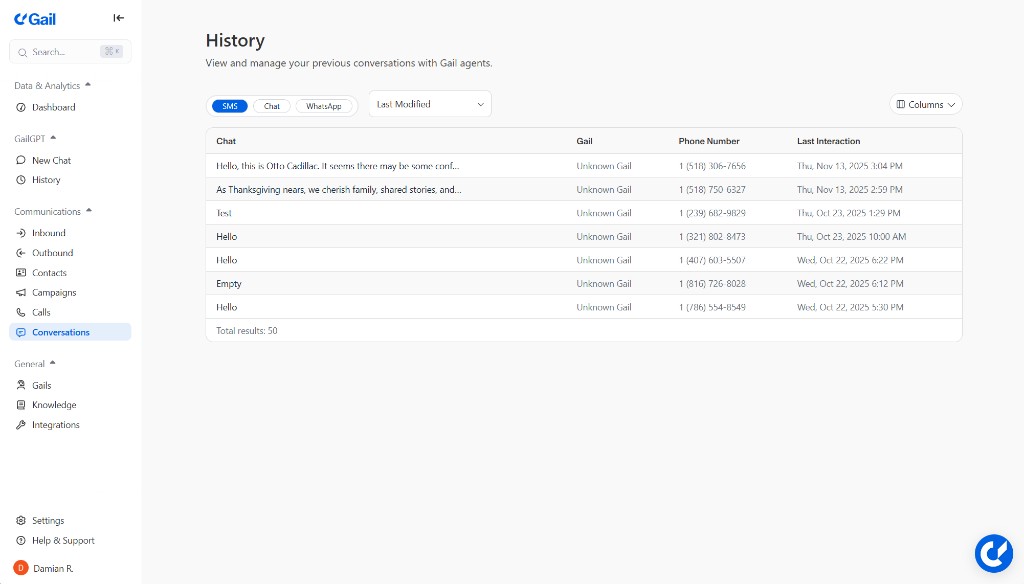
- Full conversation threads with each contact
- Customer replies including questions or requests
- Gail’s responses in the conversation
- Timestamps for all interactions
Respond to Inbound Messages
When contacts reply:

- Click into individual conversations
- Review their messages
- Respond if needed (or let Gail handle it automatically)
- Flag important conversations for follow-up
Monitor Common Themes
Look for patterns in replies:
- Frequent questions (may need FAQ updates)
- Confusion about message content
- Interest in specific offers or services
- Opt-out requests (track why customers are leaving)
Analyze reply content to improve future campaigns. Common questions can inform your next message templates.
Step 9: Analyze Campaign Performance
Review key metrics to understand campaign effectiveness.
Monitor Inbound Activity
Watch for campaign impact:
- Increase in inbound SMS replies
- Uptick in phone call volume
- Appointment bookings
- CRM updates from campaign activity
Review Opt-Out Rates
Pay close attention to opt-outs:
Healthy Opt-Out Rate: 0.5-2%
High Opt-Out Rate (3%+) May Indicate:
- Message frequency is too high
- Content isn’t relevant to audience
- Wrong audience targeting
- Messaging tone is off
- Opt-in consent was weak or questionable
Assess Engagement Quality
Beyond numbers, evaluate:
- Response quality - Are replies meaningful and engaged?
- Conversion rate - Are SMS recipients taking desired actions?
- ROI - Does the campaign generate positive return?
- Customer sentiment - Are replies positive or negative?
Campaign Optimization Tips
Use these insights to improve future campaigns:
Improve Delivery Rates
If delivery rates are below 95%:
- Clean your contact lists - Remove invalid numbers
- Verify phone format - Ensure proper E.164 formatting
- Check carrier blocks - Some carriers may filter messages
- Simplify content - Remove excessive links or spammy language
Boost Response Rates
To increase engagement:
- Ask questions - Encourage replies with clear questions
- Create urgency - Time-sensitive offers get more responses
- Personalize heavily - Use more than just first names
- Segment better - Target more specific audiences
- Make it relevant - Ensure content matches recipient needs
- Optimize timing - Send when recipients are most likely to engage
Reduce Opt-Outs
To minimize unsubscribes:
- Limit frequency - Don’t over-message contacts
- Increase value - Every message should benefit the recipient
- Segment appropriately - Send only relevant content
- Set expectations - Be clear about message frequency upfront
Test and Iterate
Continuously improve through testing:
- A/B test message templates - Compare performance
- Test different CTAs - Find what drives action
- Experiment with timing - Find optimal send times
- Try different formats - Short vs. detailed messages
- Test personalization levels - Find the right balance
Best Practices Summary
Before Launching Any Campaign
- ✅ Confirm SMS approval is active
- ✅ Verify all contacts have opted in
- ✅ Test with yourself first
- ✅ Check all links work
- ✅ Verify personalization populates correctly
- ✅ Review message for compliance
- ✅ Schedule for appropriate times (9 AM - 7 PM in most states)
After Campaign Completion
- ✅ Review all conversations thoroughly
- ✅ Document lessons learned
- ✅ Update contact lists (remove opt-outs)
- ✅ Plan improvements for next campaign
Compliance Reminders
- ✅ Only text contacts who opted in
- ✅ Include business name in every message
- ✅ Provide clear opt-out instructions
- ✅ Honor opt-outs within 24 hours (immediately is best)
- ✅ Keep records of all consents
- ✅ Send during appropriate hours
- ✅ Follow TCPA and carrier guidelines
Violating SMS compliance regulations can result in fines up to $1,500 per message. Always follow TCPA guidelines and maintain proper consent records.
Common Campaign Types and Use Cases
Appointment Reminders
When to send: 24-48 hours before appointment
Template example:
Payment Reminders
When to send: 7 days before due date, then on due date
Template example:
Policy Renewals
When to send: 30, 14, and 3 days before renewal
Template example:
Event Invitations
When to send: 2-3 weeks before event, reminder 1 day before
Template example:
Troubleshooting Common Issues
Campaign Won’t Start
Possible causes:
- SMS approval not complete
- Contact list empty or invalid
Solutions:
- Check Settings → Verify Messaging for approval status
- Verify contact list has valid phone numbers
Low Delivery Rates (Below 90%)
Possible causes:
- Invalid phone numbers
- Disconnected numbers
- Carrier filtering/blocking
Solutions:
- Clean your contact list and remove invalid numbers
- Verify phone number formatting (use E.164 format)
- Review message content for spam triggers
- Check with Gail support about carrier issues
High Opt-Out Rates (Above 3%)
Possible causes:
- Messaging too frequently
- Content not relevant to audience
- Poor targeting/segmentation
- Weak initial opt-in consent
Solutions:
- Reduce message frequency
- Improve audience segmentation
- Increase message value and relevance
- Review and strengthen opt-in process
- Survey opt-outs to understand reasons
Variables Not Populating
Possible causes:
- Variable names don’t match contact fields
- Contacts missing data for those fields
- Incorrect template syntax
Solutions:
- Verify variable names match contact data exactly
- Check contacts have data in required fields
- Ensure variables use correct syntax (
@FieldName) - Test with contacts that have complete data
No Replies or Engagement
Possible causes:
- Message lacks clear call-to-action
- Wrong audience targeting
- Poor timing
- Links not working
Solutions:
- Add clear, compelling call-to-action
- Refine audience segmentation
- Test different send times
- Verify all links work correctly
- Make content more engaging and valuable
Next Steps
Congratulations! You now know how to set up, run, and analyze SMS campaigns with Gail. Here are some ways to take your SMS strategy further:
Explore Advanced Features
- Sequences - Combine SMS and voice calls in multi-step flows
- Post-Call SMS - Send automated texts after calls
- Redialing Rules - Set up intelligent follow-up strategies
Deepen Your Knowledge
- SMS & Text Messaging - Master text template creation
- Managing Contacts - Ensure up to date contact information
- Reviewing SMS Conversations - Detailed conversation analysis
Optimize Your Strategy
- Call Logs - Track voice performance
- Analytics Overview - Understand your communication metrics
- Outbound Campaigns Overview - Learn about all campaign types
Get Help
If you have questions or need assistance:
- Contact Gail support through your dashboard
- Review the FAQ for common questions
- Check the Changelog for new SMS features
Happy messaging!