
Welcome New Leads
When a new lead comes in, the first few minutes matter. This guide builds a workflow that reacts the instant a lead arrives: it saves them as a contact, texts them a friendly welcome, and enrolls them in a nurture campaign so the follow-up happens on its own.
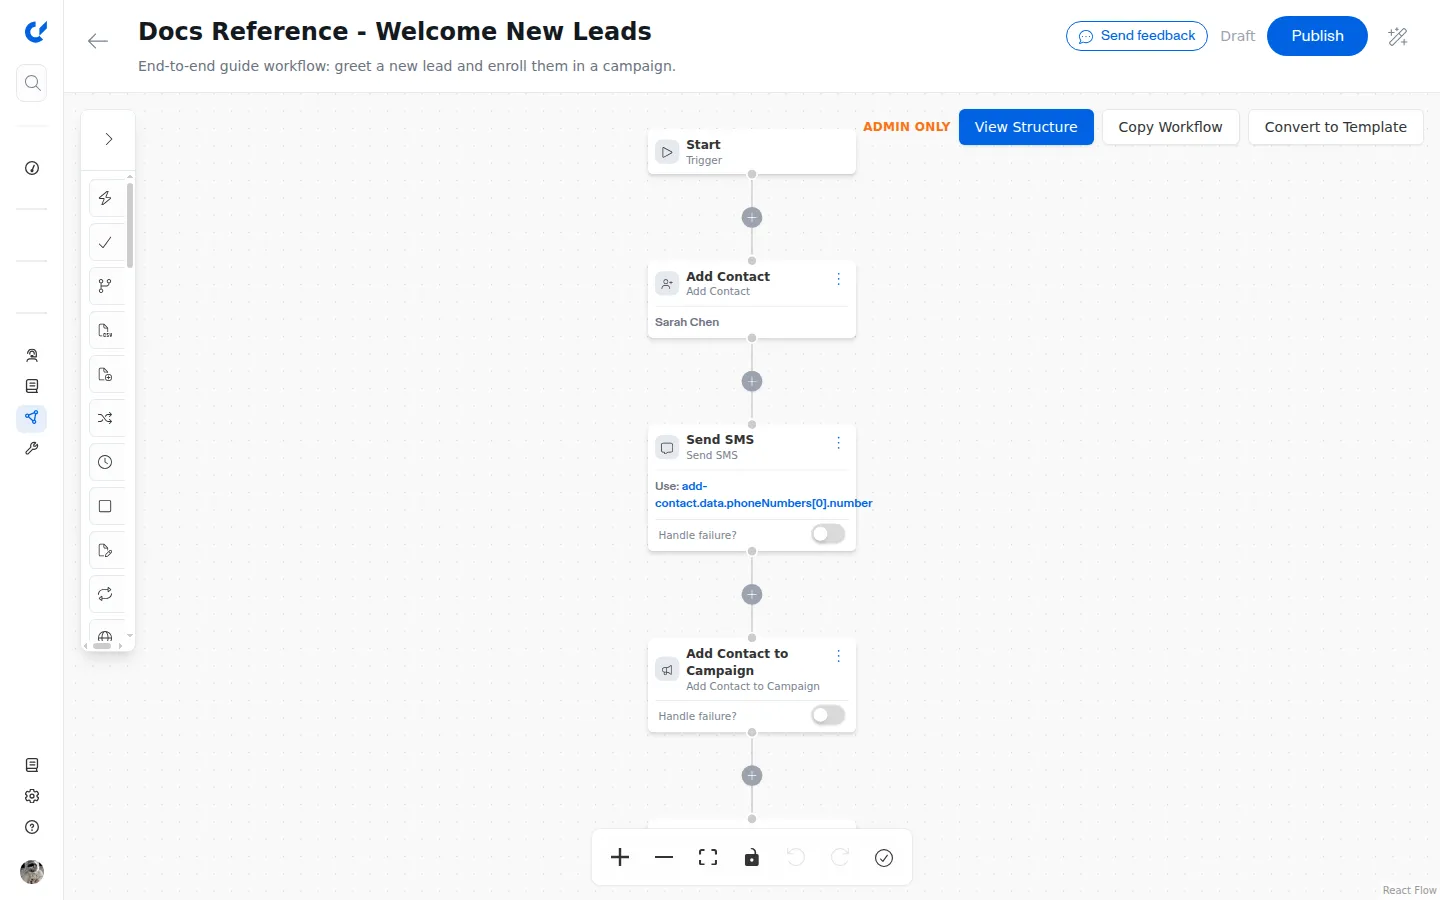
The workflow has five steps that run top to bottom:
Start, then Add Contact, then Send SMS, then Add Contact to Campaign, then End.
What each step does
- Start is the trigger. Here it is a webhook, fired by an external form or your CRM the moment a lead is created. The lead’s details ride along in the request.
- Add Contact saves the lead as a contact in Gail.
- Send SMS texts the new lead a warm welcome, sent to the phone number the Add Contact step just recorded.
- Add Contact to Campaign enrolls the new contact in a nurture campaign so outreach continues automatically.
- End finishes the run.
Build it step by step
Set the Start step to a webhook trigger
Leave the Start step as the entry point and configure it as a webhook, so an external form or CRM can start a run whenever a lead comes in. Publishing the workflow gives you a URL the other system calls. See Triggers & Webhooks for the full setup, and the Trigger from a Webhook recipe for a quick walkthrough.
Add the Add Contact step
Add an Add Contact step below Start and fill in the lead’s details. In this example the fields are typed in directly so you can see the shape of it:
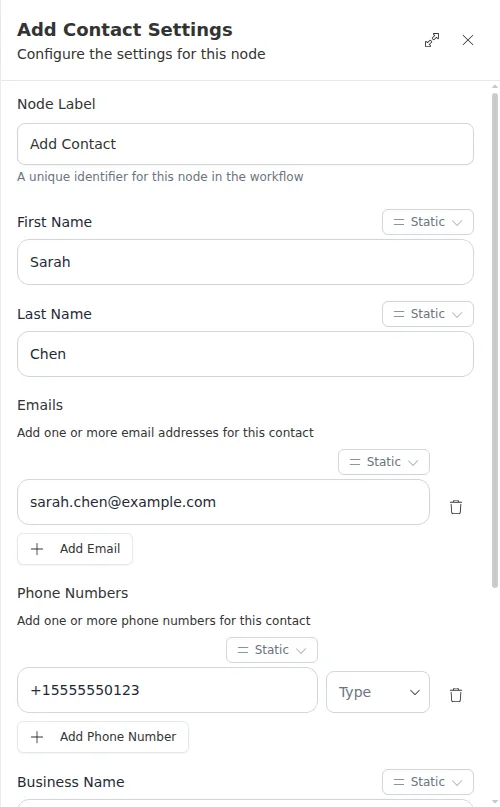
In a live webhook flow you would not type a fixed name. Instead you would point each field at the matching value from the incoming request, so every run saves the real lead. See Variables & Data Flow.
Add the Send SMS step
Add a Send SMS step below Add Contact. For the To field, do not type a number. Point it at the phone number the Add Contact step just saved, using this expression:
For the Message, write a short, friendly welcome, for example:
Add the Add Contact to Campaign step
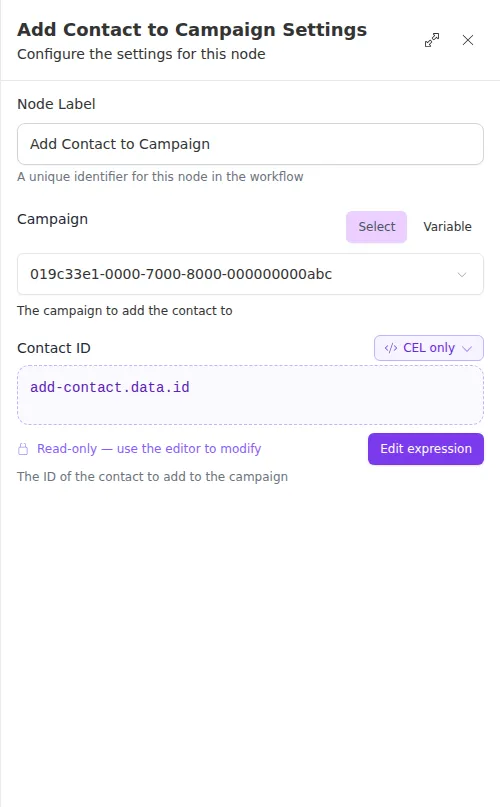
Add an Add Contact to Campaign step below Send SMS. Choose the nurture campaign from the picker. For the Contact field, point it at the contact this run just created with the expression:
Test it before you rely on it
Before this workflow greets real leads, watch it run once. You can step through a run and confirm the welcome text goes to the right number and the contact lands in the campaign. See Testing & Debugging.
A run does real work. Send SMS sends a real text and Add Contact really saves a contact. Use your own phone number and test details while you are trying things out.